Wednesday, 13 October 2010

Bottling It (rhubarbrhubarbrhubarbrhubarb)

Yes well, it's been a while (again.) Sorry about that. Still, the internet preserves stuff too, so hopefully this will come in use, still fresh as a proverbial, when rhubarb comes around again.
Inspired by Austerity Britain and feeling adventurous, we decided, some months ago now, to turn our hands to the endangered art of rhubarb-bottling. Aided and indeed abetted by this Grauniad food blog, we set about collating the necessary.
Rhubarb was our first concern. We have a rhubarb plant but it's not yet a year old and wasn't able to supply our prodigious needs. Fortunately, Hazel's farm has, in common with many such establishments, a neglected patch of rhubarb malingering round the back. She donned wellingtons and, armed with sharpened secateurs, slew enough for our bountiful bottling.
Next, the jars. There's a bit of a rammy going on in the comments of the linked blog post about the relative merits of Leifheit and Kilner jars, but for us it was simple - we could only get Kilner, which in any case fitted our patriotic milieu . The imposing assistant at John Lewis told us they were the best anyway, and that was good enough for us. Much later we did find some Leifheit ones at Marchmont Hardware, our local hardware shop, so they themselves may make an appearance in the future (they're on top of our cupboards now)
We were ready to go.
Washing the rhubarb took longer than I expected, giving it a good scrub to remove all that Aberdeenshire earth. We only have a photograph of that taken with the webcam built in to my laptop. Here it is:


The rest of the kitchen was really clean, honest.
While one of us was doing that, the other made a sugar syrup to put the rhubarb in.
This was all time-consuming, but relatively easy. We put the rhubarb into the syrup and left it there until the following evening, with a lid over it.
The next day it smelled beautiful when we lifted the lid off, ready for the most complex stage. We packed the rhubarb into our jars, but could certainly have packed more in. We didn't quite take seriously enough the recipe's stipulations to pack them in like commuters in a rush hour, not properly appreciating that the rhubarb cooks inside the jar in the next part of the process. No appreciable harm was done, but there are gaps in the finished product. The reboiled syrup topped up the jars and they were sealed up, then released a little bit just to let the air out.

Not having an actual jam pan caused us some difficulty here, as we were using the monstrous stock pot seen elsewhere on this blog with steep, tall sides, so manoeuvring the jars in and out was a challenge. We sat them on a teatowel and fretted as there was only just room for them all in the pan without them touching. We fretted some more about the concept of bringing to the boil over half an hour on an electric hob that always seemed over-eager to provide great quantities of heat. We mainly achieved an approximation of accuracy by turning it up one, fretting a bit, then turning it down. In the end, it took longer than half an hour to bring to the boil, because we feared the consequences of being too quick. While the pan of water they were immersed in boiled, the jars expelled air in a flatulent manner, which was pleasing to one so juvenile as I. We then bundled them inexpertly out of the water and sat watching them anxiously for the pop that signifies a seal. Incidentally, we were worried, given the sustained period of heating endured by everything in the pan, that we would burn the teatowel horribly. In the end it came out slightly singed, but still usable and everything. Don't however, use an heirloom or anything you mind getting, well, slightly singed.
All three jars gave a very satisfying pop one after the other and are now sitting in our cupboard. We're open to suggestions for their use.

Thursday, 13 May 2010

Testing our Nettle

Lawks, two months have passed since the last post, so I guess technically some might say we've failed at submitting a monthly post. However, trite as it sounds, lets adopt the philosophy that you only fail if you stop trying, and carry on regardless.

This month, we have rediscovered the stinging nettle. It seemed that everything we read of Urtica dioica left us marvelling at how such a useful plant could be so overlooked. At points, we of the shelf-preservation society kitchen were verging on evangelical in our enthusiasm. One of their manifold nutritional, tasty and medicinal uses (not to mention their value as a raw material for textile and as a vegetable dye) is flavouring for cordial. So, we went forth and foraged a carrier-bag full.

When picking nettles, obviously gloves are pretty handy! Pick just the top shoots when the nettles are young and green, or new growth after they have been cut, as they become bitter and gritty when they are older. We foraged some nettles from alongside paths and hedgerows in Edinburgh, being careful to avoid nettles that were growing right beside where dogs are regularly walked, but for the cordial we found our backgreen was the most productive and convenient site.

First, we combined 500ml boiling water, 1kg sugar and 40g citric acid in a large saucepan and mixed together until all the sugar had dissolved. We brought this to the boil and boiled rapidly for a few minutes. Then we chopped 100g of nettle tips and added these to the pan, which we removed immediately from the heat.

All that was left to do then was to leave this concoction in a cool, dark place for a week (the recipe advises 5-7 days), stirring now and then. I loved getting a whiff of the fragrant nettles when I checked on its progress. We were surprised at how reminiscent the scent is of gooseberries, while being unmistakably nettles, which to me evokes summer like little else.


Then we just strained it all through a jeely bag or muslin cloth and poured into sterilised bottles. The colour of this also surprised us - it's a gorgeous, jewelled orange colour in the bottle. More importantly, it tastes delicious, a little like gooseberry wine and a fantastic summer thirst-quencher, I'll wager.

What's more, the anti-inflammatory properties of nettles mean that the cordial is good for alleviating hay-fever symptoms - just what's needed after a hard day's foraging. All this, and we didn't have to spend any extra money because the nettles are wild and we had all the other ingredients in the store cupboard - I'd call that a resounding success!


The Sting in the Tale
We have also been enjoying eating nettles this month. They are great in soup, risotto, gnocchi and steamed like spinach. We also have a recipe to make nettle haggis. THey contain large amounts of iron, vitamins a and c and protein, as well as chemicals which aid the body's absorption of iron and other nutrients. Apparently they also make good beer, which sounds like it'd be worth a go.
Nettles are also really good for the garden (in fact we put the leftover leaves as a mulch on some of the garden plants).
Another use for nettles is as a vegetable dye, giving an orange colour, or they can be spun into fibre for cloth as well.
Not bad for a widely-hated, ubiquitous "weed"!

Thursday, 4 March 2010

(Blood) Curd(ling) Tales (Of Terror)

Well, following our lemon cordial adventure we had rather a surfeit of citrus, as we'd bought enough for one recipe but then used another (Of such communication skills are happy partnerships made). Anyway as I'm going through a curd-devouring phase at the moment and we had all the requisite ingredients, curd it was.
We used Jane Grigson's recipe from English Cookery which is brief - so brief it's almost terse. We ran into a couple of problems as a result of that, but I'll outline them here to help poor unfortunates who stumble across this blog, so they don't repeat them. We also upscaled the recipe to make a bit more because we're gluttons*
She recommends sugar cubes, that you can rub on the outside of the lemon for extra graininess, but not being owners of a guest house or absinthe enthusiasts, we didn't have any. 600g of plain old sugar, then, and 6 lemons, given a good scrub first because they were waxed. I like to imagine that lemons are waxed with old candles the way you wax a zip on a lifejacket or somesuch, but in point of fact I know this to be untrue.


Then we zested and juiced the lemons and combined all of this with the sugar and one pack (250g) of butter - it was this which dictated our expansion of the recipe - it was all we had. It was supposed to be a bit more than that, but we decided that the small matter of 20 grams didn't matter, not between friends. We cut the butter up into chunks which then stuck together, because I didn't do it very well. This all went into a rather big pyrex bowl. It was important that the bowl was big, because next we put that over a pan of boiling (well, simmering) water, in lieu of a bain-marie. There's another reason the bowl had to be fairly sizable, and I'll come to it next paragraph.


When the butter was melted and it all mixed together fairly contentedly, we beat 9 eggs in a separate bowl, then beat them into the mixture. (for those of you keeping track from last paragraph, that's the other reason it had to be a big size). From here on in all Ms Grigson advises is "stir steadily until the mixture becomes thick."
Which is great, but we were surprised at how long that took. By now it was really looking and smelling like lemon curd. We kept stirring it and kept it hot but not boiling - it's all about cooking the egg properly. I should note as well here, just in case it wasn't clear earlier, that we put nine whole eggs in, yolk and albumen both.


It's occurred to me that saying we stirred the mixture for "aaaages" is no real help, even if I precede it with a great many intensifiers. I've discussed it with Hazel and we're in agreement we stirred it for around half an hour after the addition of eggs. It doesn't go as thick as it is when cooled, but in the next couple of photographs we've attempted to give a pictorial guide as to consistency. I'd say it was about as thick as PVA, if that's any help to you.


We'd sterilized a few jars earlier in the process by bunging them in the oven on newspaper at around 160C for, well, ages actually as we were busy stirring the confounded curd. The funnel that wasn't man enough for the marmalade did well here and by later that evening we were scoffing it down on freshly baked bread (in the breadmaker, mind, the kitchen was in too much of a state to attempt the other way.


*Hazel may not actually be a glutton


Monday, 22 February 2010

Foragers Forever

With the first food for free crops merely weeks away I thought I'd write a wee note about some resources which we have been gathering on wild food.

At the end of January, we had a Kitchen outing to a talk being given on foraging in Edinburgh by Xa Milne, who along with her pal Fiona Houston took her family on a yearlong foraging adventure and wrote a book about it. The book, 'Seaweed and Eat It', is an inspiring introduction to urban foraging, and contains tips on where to gather various wild foods and also what to cook with them.
(I'm afraid I'm going to have to link you to Amazon here, but Other Bookshops Are Available!) http://www.amazon.co.uk/Seaweed-Eat-Foraging-Cooking-Adventure/dp/0753513412
Dr Pessimist Anticant was really quite enthused by Xa's anecdotes, and both of us fell to considering the possibilities for using foraged food in preserves. At the talk we were treated to some homemade elderflower cordial, hedgerow jam and crab apple jelly. The book contains a catch-all recipe for blossom cordial, because you can make cordial from the blossom of any tree with edible fruits, and even some without. Examples given are blackthorn, crab apple, sweet cicely and meadowsweet. Then there's nettle and dandelion. Then there are syrups of rosehip, dandelion or clover blossom. And a while chapter on edible seaweeds. I'm really looking forward to trying to find some carageen this summer and having jellies and set puddings made from it.

Another resource we have recently acquired is 'The Wild Food Yearbook' (http://www.countrykitchenmag.com/book-club.php) which is packed with recipes and tips for where to find things. It also has useful chapters such as 'Jams and Jellies: The Basics', and pictures which will be more useful for identifying things than in Seaweed and Eat It.

For the most helpful identification guide though, we have acquired the Collins Gem 'food for free' book (http://www.amazon.co.uk/Food-Free-Collins-Richard-Mabey/dp/0007183038) which we'll be carrying in our pocketses when out and about.

So, keep your eyes peeled for some nettle concoctions when spring has more confidently sprung!

Easy Peezy Lemon Squeezy (Or, When Life Gives You Lemons...)


Once upon a February evening, two squash novices set about making some lemon cordial....

Having debated amongst ourselves for some time about which recipe to use for our cordial, we opted for one which looked simple and used both citric and tartaric acid. We never quite got to the bottom of exactly what function these ingredients have in a lemon-based foodstuff (citric acid is extraced from lemons anyway, isn't it?) but we reckoned that it would probably be a preservative one. And since we'd gone to the trouble of ordering them in from this website http://www.simplynatural.org.uk/ we thought we might as well use them. WE checked in all the places local to us that we thought might stock these things, but to no avail.

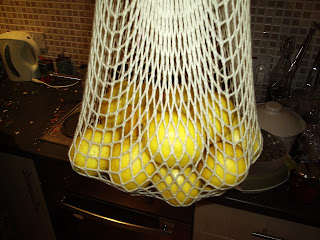
So, the recipe we followed can be found at this address http://www.cuisine.com.au/recipe/lemon-cordial. First, we started with a lovely looking bag of lemons (the recipe calls for 6, but ours were a little on the small side so we used 7 for luck). We scrubbed and zested two of them, and juiced these and the rest.


Meanwhile, we dissolved 2kg of sugar in 1 litre of water. I had been on the lookout for cheaper sugar since it was pointed out to me that lots of preserving means using lots of the stuff, and, happily, I found some in time for this recipe. It's Silver Spoon 'Homegrown Sugar', and the reduction in food miles excited me until I remembered that extracting sugar from sugar beet uses huge amounts of energy. Still, the back of the packet assures me the heat byproduct of the process is used to heat vast greenhouses where tomatoes grow, so at least its not wasted. At 70-odd pence a kilo from our local corner shop I think its about half the price of cane sugar.

So, now we'd made a syrup. To this we added 30g each of citric and tartaric acids and stirred well to dissolve. Once this was cool, in went the lemon zest and juice, and we had a stock pot full of cordial!


So we sterilised a few bottles using the technique we learnt last month for the marmalade, and bottled about 2 and a half litres. Here is a picture of one of the kitchen hands taking the sterilising process very seriously:


The cordial is stronger than most shop-bought ones, so only a little is needed. It is Very Lemony, which I liked, but the more lily-livered among you may want to add more sugar.

WE'll keep you posted on how long it lasts on the shelf (although it might not get a chance to prove itself, as we seem to be getting through it at a fair old rate)

Saturday, 30 January 2010

Intent Cordial

Well, today we were hoping to make lemon cordial. Not strictly seasonal, but we hoped that the experience would prime us for things like elderflower and nettle later in the year. Unfortunately, we need citric acid for that (for the "preservation" part) and there's none to be found in the shops hereabout. I wish there were proper chemists still.
Nomatter, because I've bought some on the internet, which is not how I'd prefer matters, but a necessary evil.

Monday, 25 January 2010

We Marmamade Marmalade

well, as my esteemed colleague and co-conspirator has set out our stall pretty well, I shall set about filling it up with marmalade. People tell you you need loads of equipment for marmalade, but you really don't. Our biggest extravagance was a 20 litre stock pot, which we justified with the thought that we might one day need to make a few gallons of stock and in any case, I suspect that this won't be the last time you see it on this blog either. We've been saving up jars for a little while too leading to a fairly motley collection of them, but it doesn't matter. The only specialist jammy thing we bought was a muslin bag, available in your local hardware shop and probably in Ikea too.

We used Delia's recipe on the UKTV food site because it's a hardwired British thing to trust her implicitly, despite her tendency to overcomplicate things, and because it was free.

We weren't sure how much marmalade would fit in the pan so we just went with the quantities specified, although it turned out we could've fit double into the pan. Double the quantities, I mean, not ourselves doubled over - it's not that big.

We bought a bag of seville oranges and two bags of sugar, then we began...
After juicing the oranges, we set about chopping up what remained. Like so.


I'd never made the connection between the shreddy bits of marmalade and the actual orange peel which as any fule kno ye cannae eat. Turns out of course, that you can. This is probably not news to any of you, but I was amazed by the elegance of the process. The pips and pith went in the muslin bag, which we'll come back to later, meaning the whole of the orange is used. It's beautiful, in its own way.

I've said orange all the way through, although I should at this point make it clear there's also a lemon in there.

The little shreds were hard for me to get little enough and I certainly scored the chopping board a little. I had to forcibly remind myself exactly what it was I was making. Into the pot it all went, together with truly heroic amounts of sugar, with the bag tied to the handle of the pan.


Two hours later, it was beginning to look like marmalade.


We squeezed the bag, which after two hours had turned quite unpleasantly jeely-like. Hazel, I admit, did most of the squeezing, because it was giving me awful Coral Island flashbacks and unpleasant intimations of my own mortality.
It was not eyejelly though or ectoplasm or any of that whatnot, but pectin.
I mentioned earlier that Delia likes to make things complicated - in her recipe we're following she starts to go on about saucers in the fridge. We ignored that and seemed to do ok.


We put it all in and simmered some more. By now it really resembled honest-to-goodness marmalade, so as we were in the home strait we decided to sterilise the jars. I had imagined, and not for the rhetorical purpose of explaining it to you, gentle reader, that it was going to be a complex procedure, probably because of the medical connotations of the word, but actually we bunged them in the oven at about 160 degrees c on a sheet of newspaper for about 20 minutes while we refrigerated a small sample of the marmalade to see if it would set. When we found it was setting it was into the still warm jars with it..


You might notice a funnel lying there, unloved and destitute-looking. In deference to the recipe, we did try to use a funnel, but there was no way my thick shreds would fit through it. Serving spoon it was then. I made a wee bit of a mess, but it was a fun mess to make, so i make no apologies.
We had some buns I'd made (from a recipe from Greenway's excellent blog) left over and by Timothy, they went well.


And there's the first fruits of our endeavour, with circles of baking parchment stuck in the top of the jars. I'm quite proud of it!

Thursday, 21 January 2010

The Shelf Preservation Society Way

Greetings!
Welcome to the Shelf Preservation Society, where myself and Dr Pessimist Anticant will share our journey into the world of conserving, preserving and fermenting.

Several motives drive this exploration. The enjoyment gleaned from learning new skills plays a large part, as does curiosity about the methods by which different foods are made. Imagining proudly giving friends and family our own produce, being able to experiment with combinations of ingredients and getting creative in the kitchen also feature. We might save a little money in the long run (perhaps), and we might be able to help to keep dying crafts and skills alive. We will be trying to ensure we decrease our food miles, and reuse glass bottles and jars, so the impetus is also an ecological one. We will be able to enjoy asking the advice of friends and family who have learnt these skills, and thanking them with a full jar or bottle.

The key aspects for me, however, are preventing wastage of produce from our kitchen garden, thereby helping us to better sustain ourselves from that homegrown, organic produce, and pursuing a DIY approach to life. Going a little further towards liberating us from the role of consumer, with all its dependencies and vulnerabilities, and increasing our resilience in uncertain times.

To those ends, here in The Society kitchen, we will attempt to produce one new preseve, conserve, pickle, chutney or ferment every month for 2010, and invite you to join us on our journey. Wish us luck!